University of Perugia validates new dental 3D printing materials with Artec Micro II
Challenge: Measuring 3D-printed crowns with sufficient accuracy for comparative analysis and to determine if they outperform those made with conventional dental materials.
Solution: Artec Micro II, Artec Studio, CloudCompare, MATLAB
Result: Highly detailed dental 3D models which showed that one 3D printing material yielded implants with fewer deviations (and greater potential) than another. The same workflow will now be used for further analysis at the request of an Italian dental 3D printing specialist.
Why Artec 3D?: Micro II captures small objects automatically, at high-speed. Resulting data can then be used for reverse engineering and inspection inside Artec Studio. Built-in tools allow for data processing, mesh editing, and deviation analysis in a single software. More advanced users can send 3D models for deeper investigation elsewhere at the click of a button.
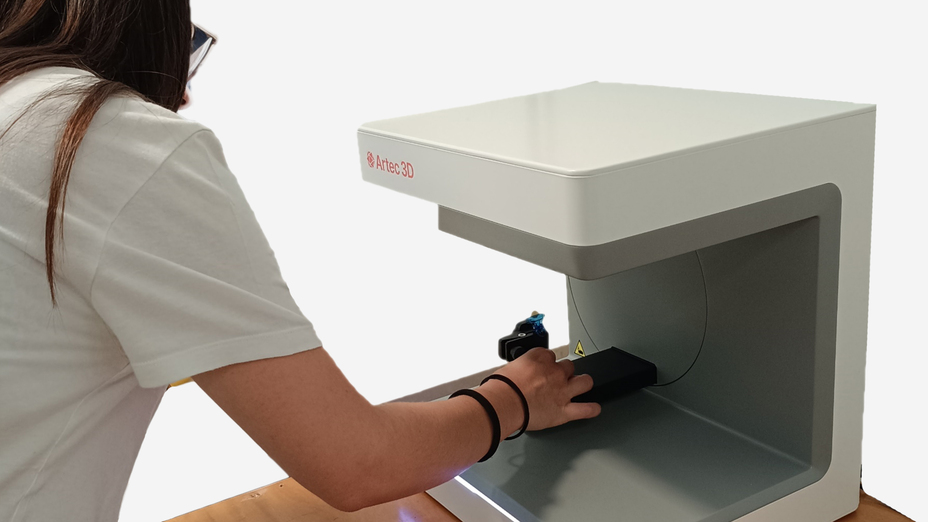
A student at the University of Perugia 3D scanning an implant with Micro II. Image courtesy of the University of Perugia
The dental industry is seeing a surge in 3D printing, with the technology allowing growing numbers of dentists to rapidly create custom implants in clinics around the world.
When it comes to customizing implants like dental crowns, bridges, guides, and aligners, 3D printing is faster, more accurate, and (in the longer term) less expensive than traditional impression making. But there are drawbacks, especially around material compatibility.
3D printing materials not only have to be qualified to work with certain technologies, they need to be tested for durability, aesthetics, shrinkage, and human safety. At the moment, these issues limit variety and make older, tried and tested methods attractive to experienced dentists.
Getting new resins into the hands of these dentists requires a great deal of research. Often, this centers on geometric accuracy analysis, but print size and speed can also be serious challenges here. So, how do you rapidly, repeatedly digitize and test tiny 3D-printed implants?
To address this problem, a nationwide collaborative research initiative has been set up in Italy, involving the Dental School at the University of Turin, Turin Polytechnic, the University of Catania, and the University of Perugia. Seeking new ways of automating metrology at their Smart Manufacturing Laboratory, the latter have just got their hands on the Artec Micro II desktop 3D scanner. As it turns out, this project has offered the perfect opportunity to test their ideas on real-life products made by a dental implant manufacturer, in a way that could aid the wider adoption of 3D printing and improve the patient experience.
Digitizing dental implants for inspection
The University of Perugia’s Smart Manufacturing Laboratory opened a couple of years ago. The head of laboratory, Associate Professor Nicola Senin, who recently inaugurated its metrology division, says that one of the lab’s main goals is “making measuring systems intelligent” – through greater robotic automation, AI integration, and in-house software development – and investing in Micro II has allowed them to expand further into optical measurement.
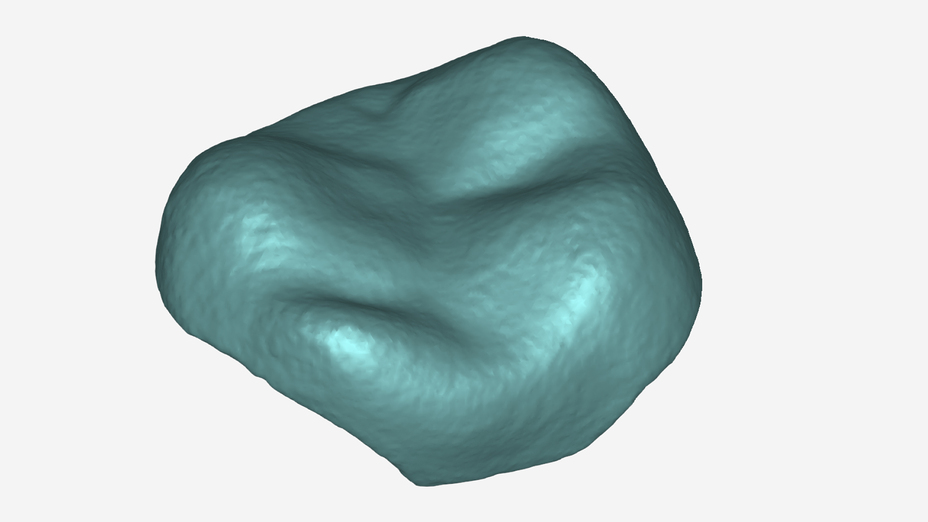
3D scan of a tooth captured with Artec Micro II. Image courtesy of the University of Perugia
The team sourced their 3D scanner from 3DZ, an authorized reseller of the most prestigious 3D printing brands, and a long-standing partner of Artec 3D. With 15 offices across Europe, 3DZ acts as a trusted consultant, supporting companies in identifying the 3D technologies that best fit their specific needs. After carefully analyzing the requirements of the University of Perugia, 3DZ recommended Artec Micro II – most due to its outstanding precision and ease of use.
Initially, the lab members used the technology to measure complex 3D-printed geometries for implants. Micro II allowed them to check accuracy and see if prints deformed, twisted, or bent. These are vital issues when creating implants, as defects lead to cracks, and cracks cause breakages. As their R&D progressed, they began to seek a more practical use case, and this culminated in the 3D printing and digital twinning ceramic restorations for dentistry project.
Backed by the Italian Ministry of University & Research, the ‘3DCer4Dent’ initiative is being led by the University of Perugia, specifically Associate Professor Elisabetta Zanetti (industrial bioengineering) and Research Fellow Giulia Pascoletti (design methods). At the university’s Smart Manufacturing Laboratory, researchers have begun 3D scanning crowns designed by a dental implant manufacturer for real-use cases, and Micro II has proven perfect for the job.
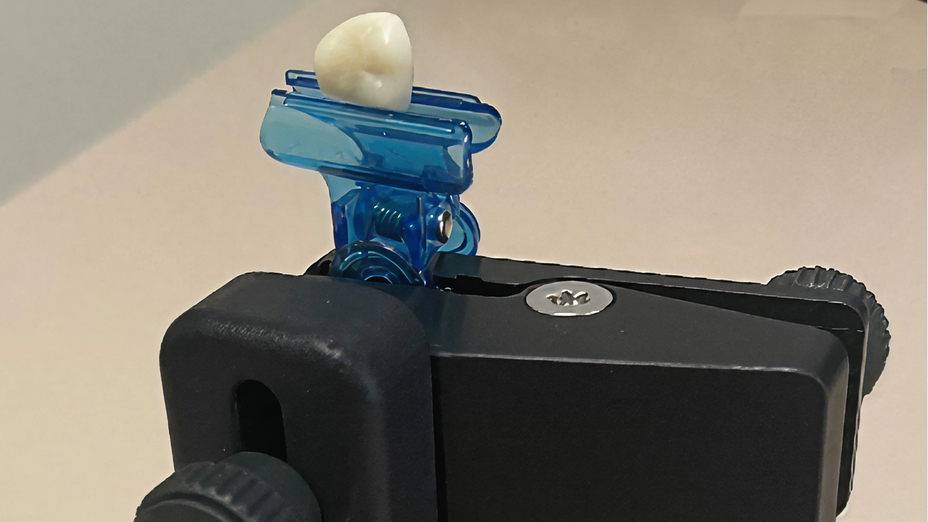
A tooth mounted to a clamp, ready for Micro II 3D scanning. Image courtesy of the University of Perugia
Each scan takes just a few minutes, with the device’s automated platform doing much of the heavy lifting. In previous cases, they’d also deploy X-rays and optical tomography for further checks. But in this application, Micro II has shown that it can capture sufficient data for definitive results on its own, with clear variations being identified between two different dental ceramics. In the longer term, further R&D could lead to improved patient care, as Zanetti explains.
“Dentists are working with resins that experience significant shrinkage. It’s not so obvious which is the optimal scale factor to be used – that’s where we’re trying to help with Micro II,” she said. “The very, very critical part is the interface between the crown and the remaining part of the tooth. You have no [dental] cement there and if the implant isn’t congruent, you can see the introduction of bacteria, then it’s going to fail.”
Analyzing new 3D printing materials
Impressively, the vast majority of the researchers’ workflow takes place inside Artec Studio. The 3D scanning and data processing software has all the tools required to turn point clouds into highly detailed meshes, ready for analysis and export in popular file types for manufacturing.
In this case, the team have found they’re able to scan one side of an implant, turn it 180 degrees, scan the other half, and quickly fuse the resulting data using point-to-point alignment. Diving into the settings even allows them to tune fusion parameters for maximum resolution – this is essential to detailed surface analysis – which they also carry out in Artec Studio.
According to Pascoletti, “one material has turned out to be better than the other, because smaller deviations have been found across 90 percentile values.” Compared to when they first started their research, at which point the team were working with traditional dental and other kinds of 3D scanner, she adds that Micro II “shows important accuracy differences” – in fact, that’s why they’ve been able to move into experimental testing in the first place.
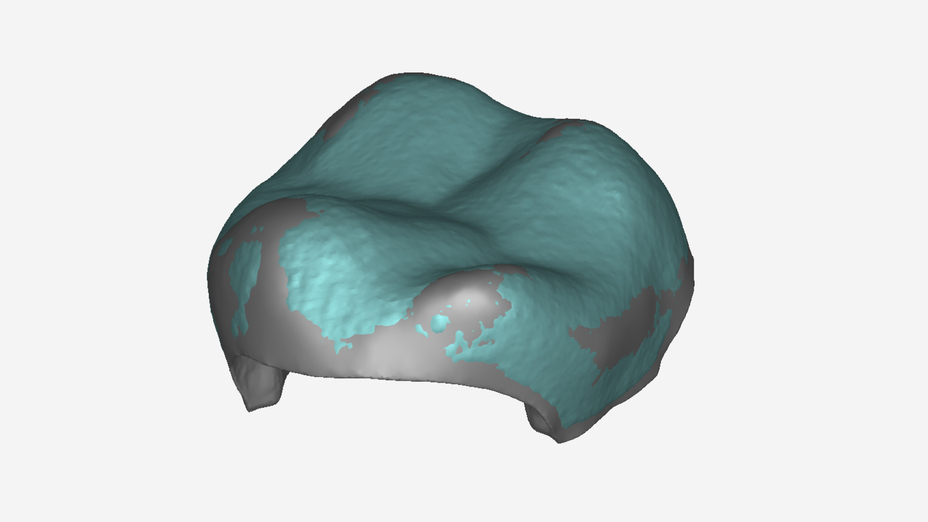
An STL file overlapped over a reconstructed mesh inside Artec Studio. Image courtesy of the University of Perugia
For deeper statistical analysis, the University of Perugia team also uses software like Cloud Compare and MATLAB. These platforms allow users to easily compute the difference between curved surfaces and crunch the numbers when investigating complex datasets. But the upshot is this: one material has outshone the other. Their approach has been validated.
Potential in dental, medical & beyond
Following their initial success, the team now plan to test at least two more zirconium materials. But their efforts aren’t just being restricted to dental, they also see potential for 3D-scan-based analysis in medical implant customization and the 3D printing of satellite components.
As well as establishing other public-private partnerships, the researchers intend to continue their work on metrology-enhancing algorithms. These include auto-viewpoint generation, a workflow in which the minimum number of scans needed from each position is calculated, with resulting models sent straight for manufacture. Wherever they head next, Micro II will be central to their plans, and Senin says the device has a bright future in both design iteration and inspection.
“Many metallic, ceramic, and polymeric materials should be measurable by Micro II,” concluded Senin. “For example, we’re also starting to measure small components made from highly engineered materials for satellites. So far, we haven’t optimized this process, and we’re not talking about a starship here. But Micro II does allow us to track geometry changes under different temperatures as a research institution at a prototype level.”
In the hands of University of Perugia researchers, Micro II is helping unlock 3D printing’s potential in medical, dental, and beyond. Who knows where else 5-micron accuracy inspection could come in handy? Clearly, this team’s research is worth keeping tabs on.
The aforementioned research project “3D printing and digital twinning ceramic restorations for dentistry” (3DCer4Dent) is being carried out with funding from the Italian Ministry of University & Research (as a PRIN initiative) with Next Generation EU backing (J53D23012190).
Those seeking more information can reach out directly to Prof. Elisabetta Zanetti at elisabetta.zanetti@unipg.it.
Scanners behind the story
Try out the world's leading handheld 3D scanners.

